How to Set Up a Complete Smart Home Security System in 3 Hours: Step-by-Step Guide for 2026
Ads
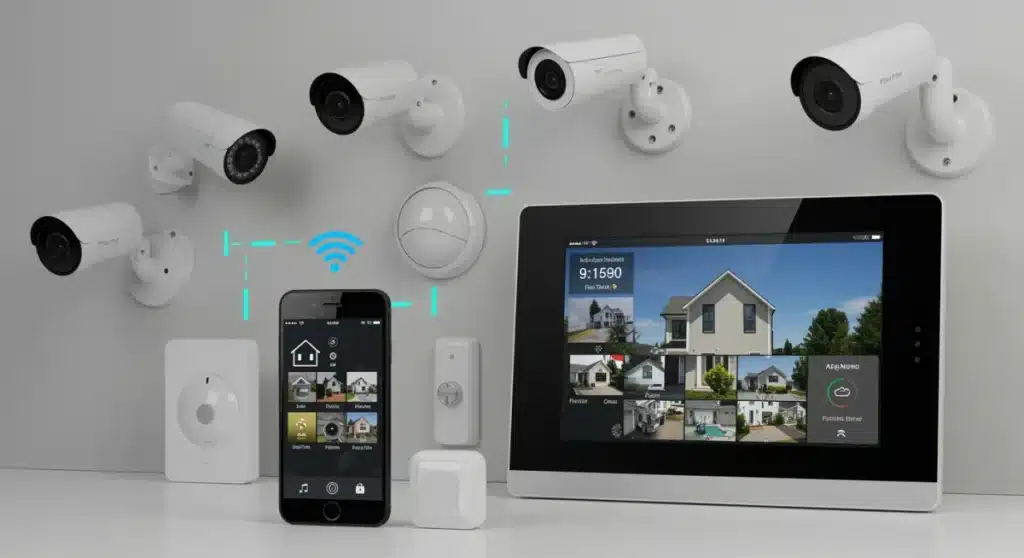
A step-by-step guide to installing a complete smart home security system in 3 hours, covering essential devices, network setup, and mobile integration for comprehensive home protection.
Setting up a smart home security system might sound like a project that requires professional installation and hours of technical work. However, with the right approach and modern devices, you can have comprehensive protection for your home in just three hours. This guide walks you through every step, from selecting the right components to getting everything connected and working together seamlessly.
Planning Your Smart Home Security Setup
Before you start unpacking devices, take time to assess your home’s unique security needs. Every property has different vulnerabilities, and understanding yours helps you allocate resources effectively.
Walk through each entry point in your home. Count all ground-floor windows and doors, as these represent the most common access points for intruders. Consider your neighborhood’s crime statistics and any previous security incidents. Also, think about specific areas inside your home that might need extra attention, such as basements with external access or detached garages.
Evaluating Your Home Layout
- Identify all exterior doors and ground-floor windows
- Map out high-traffic areas inside the home
- Note locations with weak cellular signal
- Determine ideal positions for security cameras
Your WiFi network capacity plays a crucial role in system performance. Most smart security devices operate on your home network, and congestion can cause delays in alerts or failed notifications. If you have many smart devices already, consider upgrading your router or adding a mesh network system before proceeding with security installations.
Budget planning comes next. A complete system typically includes a central hub, door and window sensors, motion detectors, security cameras, and a professional monitoring subscription. While initial costs might seem high, many homeowners find peace of mind worth the investment. Look for systems that offer expandable packages, allowing you to add components gradually.
Gathering Essential Security Components
With a clear plan in hand, it’s time to gather your equipment. Having everything ready before starting prevents mid-installation trips to the store and keeps your three-hour timeline on track.
The central hub serves as the brain of your system. It connects all devices, processes alerts, and communicates with your smartphone. Most modern hubs use Z-Wave, Zigbee, or proprietary wireless protocols to communicate with sensors. Choose a hub from a established manufacturer with good app support and reliable customer service.
Core Components Checklist
- Central smart home hub with cellular backup
- Door and window contact sensors (4-6 minimum)
- Passive infrared motion detectors (2-4)
- Security cameras (doorbell and outdoor/indoor)
- Smart lock for front door
- Siren or alarm module
- Window break detectors (optional but recommended)
Security cameras have become increasingly affordable and feature-rich. Look for models with at least 1080p resolution, night vision capability, and two-way audio. Doorbell cameras prove particularly useful, allowing you to see and speak with visitors even when you’re away from home. Many cameras now offer local storage options, reducing monthly cloud subscription costs.
Smart locks eliminate the need for physical keys and allow you to grant temporary access to family members or service providers. Many models integrate with voice assistants and can automatically disarm your system when you unlock the door using your personal code.
Installing the Central Hub and Base Stations
Begin your three-hour installation window by setting up the central hub. This device needs a central location with good WiFi coverage and easy access to a power outlet. Avoid placing it inside a closet or behind furniture, as this can weaken its connection to sensors throughout the home.
Plug in the hub and wait for it to initialize. Most devices indicate ready status through LED lights or app notifications. Download the manufacturer’s smartphone app and create your account. The app guides you through initial setup, including connecting the hub to your home WiFi network.
Hub Placement Best Practices
- Position in a central location away from interference
- Keep at least 3 feet from routers and large metal objects
- Ensure stable power connection (consider UPS backup)
- Test cellular backup functionality if included
Once the hub connects to your network, the app prompts you to add your first device. This process typically involves putting the device in pairing mode and waiting for the hub to recognize it. Each manufacturer handles this differently, so keep the quick-start guide handy.
Adding all your devices before mounting them anywhere saves significant time. Work through each sensor, camera, and smart lock systematically. Place devices on a table during setup to test connectivity before committing to permanent mounting positions. This approach reveals any problematic devices early, giving you time to troubleshoot or replace them.
Deploying Sensors Throughout Your Home
With the hub operational, sensors become your first line of defense. Door and window sensors consist of two pieces: a magnet attached to the door or window and a sensor attached to the frame. When the magnet separates from the sensor, the circuit breaks and triggers an alert.
Clean the surfaces where you’ll mount sensors with rubbing alcohol to ensure proper adhesion. Most sensors come with adhesive backing that holds well on clean, dry surfaces. Press firmly for 30 seconds after placement and wait at least 24 hours before opening and closing doors repeatedly to allow the adhesive to cure fully.
Priority Locations for Sensors
- Front door (primary entry point)
- Back door and any secondary exterior doors
- Ground-floor windows, especially those hidden from street view
- Basement windows or exterior access points
- Interior doors leading to sensitive areas like home offices
Motion sensors detect movement within their detection zone using passive infrared technology. Place them in areas with clear sightlines, avoiding positions where they might detect pets or moving curtains. Most motion sensors mount to walls using screws or adhesive, and some models include adjustable sensitivity settings to reduce false alarms.
Test each sensor after installation by opening and closing doors or walking through detection zones. The app should register each event within seconds. If you notice delays or missed triggers, adjust the sensor position or check for interference from other wireless devices.
Setting Up Security Cameras
Cameras require more planning than sensors due to their power requirements and network demands. Decide between wired and wireless options based on your comfort with installation complexity and your home’s existing wiring.
Wireless cameras offer flexible placement but require regular battery charging or replacement. Some models offer solar charging panels that extend battery life significantly. Wired cameras provide continuous power but require proximity to electrical outlets or professional installation for hardwiring.
Camera Placement Strategy
- Doorbell camera at front entry (captures visitors and deliveries)
- Outdoor cameras covering front yard, backyard, and garage
- Indoor cameras in main living areas (optional for privacy)
- Position cameras 8-10 feet high to prevent tampering
- Aim for clear views without direct sunlight glare
Connect each camera to your WiFi network through the manufacturer’s app. Most cameras now support 2.4GHz networks, which provide better range than 5GHz but slower speeds. If your router forces you to choose, the 2.4GHz option usually works better for smart home devices spread throughout a house.
Configure camera settings to match your preferences. Adjust motion detection zones to exclude busy streets or neighbor’s property. Set recording quality balancing your storage capacity with the detail you need. Enable notifications for motion events but adjust sensitivity to avoid alerts every time a leaf blows across your yard.
Integrating Smart Locks and Automation
Smart locks provide convenient access control and integrate deeply with your security system. Installation typically takes 15-30 minutes per lock, depending on your door’s existing hardware.
Most smart locks replace your existing deadbolt without requiring new holes. Remove your current lock, insert the new assembly through the hole, and secure it with the included mounting plate. Attach the exterior keypad or touch panel and connect the batteries. The app guides you through programming user codes and testing the lock mechanism.
Automation Rules to Configure
- Automatically arm system when all doors lock
- Turn on outdoor lights when motion detected at night
- Send notifications when front door unlocks
- Schedule lights to simulate occupancy when away
- Integrate with voice assistants for hands-free control
Create automation routines that enhance security without adding daily friction. The most useful automations happen automatically without requiring your attention. For example, your system can automatically arm itself at a certain time each night or when everyone’s phone leaves the geofenced area around your home.
Integrate with other smart home devices for a unified experience. Smart lights can turn on automatically when a camera detects motion, creating the impression of occupancy. Thermostats can adjust when the security system arms or disarms. These connections make your home feel intelligent and responsive.
Testing and Fine-Tuning Your System
Before considering your installation complete, thoroughly test every component and automation. This validation process ensures everything works when you need it most, rather than discovering failures during an actual emergency.
Walk through your home deliberately triggering each sensor. Open every door and window with sensors attached. Walk past each motion detector. View camera feeds to confirm clear images and proper angles. Check that notifications arrive promptly on your smartphone.
System Validation Checklist
- Test all door and window sensors individually
- Verify motion detector sensitivity and coverage
- Confirm camera streams load without buffering
- Check smart lock responsiveness and auto-lock timing
- Test cellular backup if your hub includes this feature
- Verify professional monitoring dispatch procedures
Adjust any settings that produce false alerts. Most systems allow you to customize sensitivity, delay times, and notification preferences. Finding the right balance between security and convenience takes some iteration, but the result is a system that protects without annoying you into ignoring alerts.
Document your system’s configuration and device locations. Keep this information accessible for reference and share it with household members who need to use the system. Update your home insurance provider about your new security system, as many offer discounts for verified installations.
Ongoing Maintenance and Monitoring
A security system only works when it functions properly. Regular maintenance prevents the degradation that leads to failed components or missed alerts.
Check battery levels monthly on wireless devices. Most sensors indicate low battery through the app, but periodic manual checks catch problems before they cause failures. Replace batteries proactively every 1-2 years even if they haven’t died yet, especially in devices that see frequent use.
Maintenance Schedule
- Monthly battery checks on all wireless devices
- Quarterly camera lens cleaning
- Semi-annual sensor adhesive inspection and replacement if needed
- Annual hub firmware updates and system review
- Test professional monitoring quarterly
Keep your hub’s firmware updated to maintain security patches and access new features. Manufacturers regularly release updates that fix vulnerabilities or improve performance. Enable automatic updates if available, but verify that updates complete successfully.
Consider professional monitoring for comprehensive protection. Self-monitored systems rely on your phone’s availability and your response time. Professional monitoring services dispatch emergency services when alarms trigger, even if you can’t answer your phone. Many homeowners find the monthly fee worthwhile for the added protection.
| Installation Phase | Time Required |
|---|---|
| Planning and Equipment Setup | 15-20 minutes for planning, 10-15 minutes for hub installation |
| Sensor Installation | 30-45 minutes for 6-8 sensors including testing |
| Camera and Smart Lock Setup | 45-60 minutes for 3-4 cameras and 1 smart lock |
| Testing and Configuration | 20-30 minutes for full system testing and automation setup |
Frequently Asked Questions
With proper planning and all equipment ready, a complete DIY installation typically takes 2-3 hours for a moderately-sized home. This includes the central hub, 6-8 door/window sensors, 2-3 motion detectors, 3-4 cameras, and one smart lock. Professional installation is available but usually unnecessary for most modern systems designed for consumer self-setup.
Self-monitoring works well if you’re always reachable and can respond quickly to alerts. However, professional monitoring provides 24/7 protection and dispatches emergency services even when you cannot answer your phone. Many homeowners choose professional monitoring for peace of mind, with monthly fees typically ranging from $10-50 depending on features and coverage level.
Most quality security hubs include cellular backup that activates when internet service fails. Your system continues monitoring and can send alerts through the cellular network. Some systems also include local storage on cameras, preserving footage even when cloud connectivity is lost. Always verify cellular backup is included in your chosen system for complete protection.
Yes, most smart home security systems are designed for expandability. You can add sensors, cameras, and smart devices over time as needs change or budget allows. However, check that new devices are compatible with your existing hub before purchasing. Leading platforms support hundreds of devices, but proprietary systems may have more limited options.
Many insurance companies offer discounts of 5-20% for homes with professionally monitored security systems. Documentation requirements vary by insurer, so contact your provider before installation to understand their specific discount criteria. Some companies require specific features like 24/7 monitoring, fire detection, or smart locks to qualify for the maximum savings.
Conclusion
Installing a complete smart home security system in three hours is entirely achievable with proper preparation and the right equipment. The process involves careful planning, systematic device installation, thorough testing, and ongoing maintenance to ensure reliable protection. Modern DIY systems have made professional-grade security accessible to homeowners willing to invest a weekend afternoon in setup. Once operational, your system provides continuous monitoring, instant mobile alerts, and valuable peace of mind knowing your home and loved ones remain protected around the clock.


