
How to Hang Outdoor Holiday Lights Without Damaging Gutters
Ads
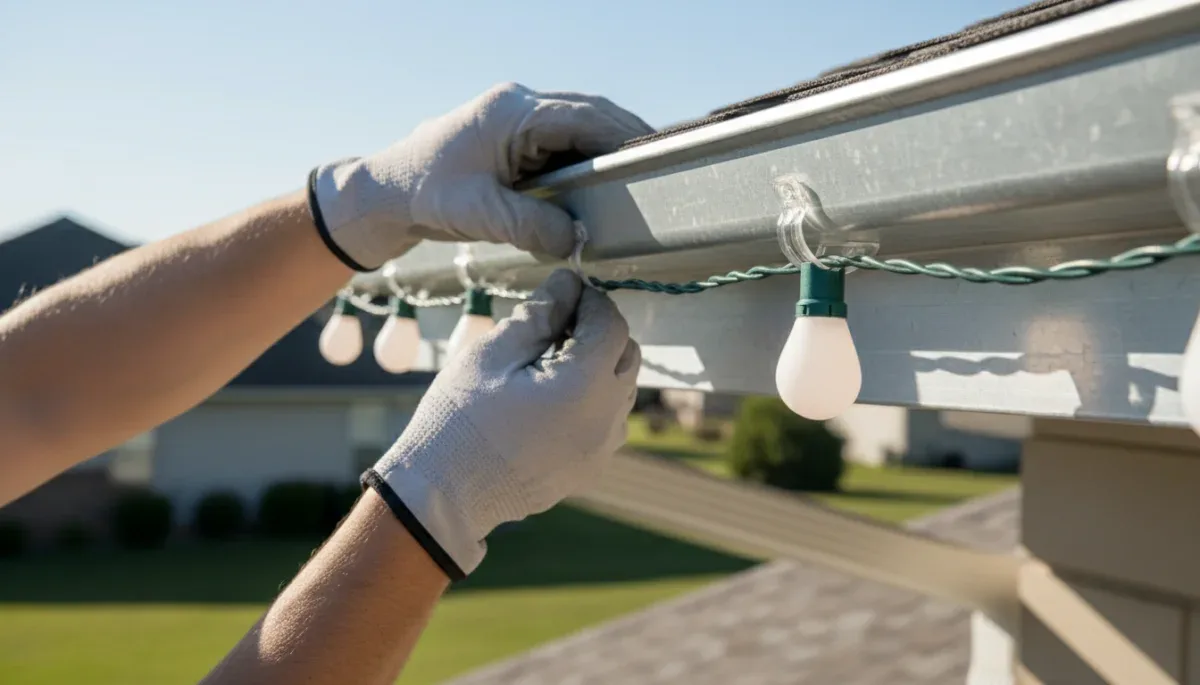
You can securely hang outdoor holiday lights along your roofline without puncturing, bending, or scratching your gutters by using purpose-built plastic gutter clips instead of metal fasteners. This non-invasive method works for standard K-style and half-round gutter systems, whether made of aluminum, vinyl, or steel, and preserves your manufacturer warranty.
This approach protects homeowners and renters from costly gutter repairs while keeping lighting aligned and stable through winter wind and snow. The main requirement is taking time to measure your roofline, selecting the exact clip style for your gutter profile, and setting up ladders safely before beginning installation.
Selecting the right non-damaging clips for gutters
Permanent fasteners such as nails, screws, and metal staples should never be used on gutters or fascia boards. Piercing the metal or vinyl creates entry points for moisture, which leads to rust, rot behind the fascia, and eventual gutter failure. Modern holiday lighting relies entirely on tension-fit plastic clips that grip the front lip of the gutter without tools or adhesives.
Ads
Universal gutter clips, often sold as all-in-one or omni clips, feature a curved hook that snaps over the rolled front edge of standard K-style gutters. A separate cradle holds the socket of the light string upright or points it downward, depending on your preferred orientation. These clips distribute the minimal weight of the light string across a broad surface area, preventing localized denting or finish chipping.
Common clip varieties and their specific uses
- All-in-one gutter clips: Compatible with C9, C7, and mini light sockets, these grip standard K-style gutter lips securely.
- Gutter guard clips: Designed with slim hooks to slide into the perforations or mesh screens of gutter protection systems without bending the wire.
- Half-round gutter hooks: Shaped with a wider radius to match the smooth curve of traditional half-round trough systems.
- Adhesive exterior clips: Intended for smooth vinyl gutters where mechanical clipping is restricted, using water-resistant exterior adhesive strips.
When purchasing clips, ensure they are made from UV-stabilized polypropylene or polycarbonate. Standard indoor plastics become brittle when exposed to freezing temperatures and direct sunlight, leading to snapping under moderate wind loads. Quality exterior clips flex enough to slide over gutter edges without snapping, yet retain enough tension to keep bulbs uniformly aligned throughout the season.
Evaluating light weight and gutter load limits
Gutters are engineered to carry water toward downspouts, but they are held to the roof eaves by hidden hangers or spike-and-ferrule fasteners spaced every two to three feet. Adding heavy decorative displays can strain aged hangers, causing gutters to sag or pull away from the fascia. Evaluating the total weight of your lighting setup is a necessary preliminary step.
Ads
LED light strings are substantially lighter than traditional incandescent sets because the bulbs use durable plastic shells rather than heavy glass, and the internal wiring operates at a lower gauge. Switching to LED strings reduces both physical weight and electrical strain. A typical 100-count strand of commercial-grade C9 incandescent lights can weigh several pounds, whereas an equivalent LED string weighs a fraction of that amount.
Before installing any lights, inspect your gutter run for existing physical issues. Look for loose mounting screws, sagging midpoints, or standing water, which indicates poor drainage. If a section of gutter yields or flexes when lightly pressed by hand, reinforce the mounting hardware before attaching any decorative lights. Adding light strands to a compromised gutter system increases the likelihood of system detachment during heavy snow accumulation or ice storms.
Setting up ladders without crushing gutter edges
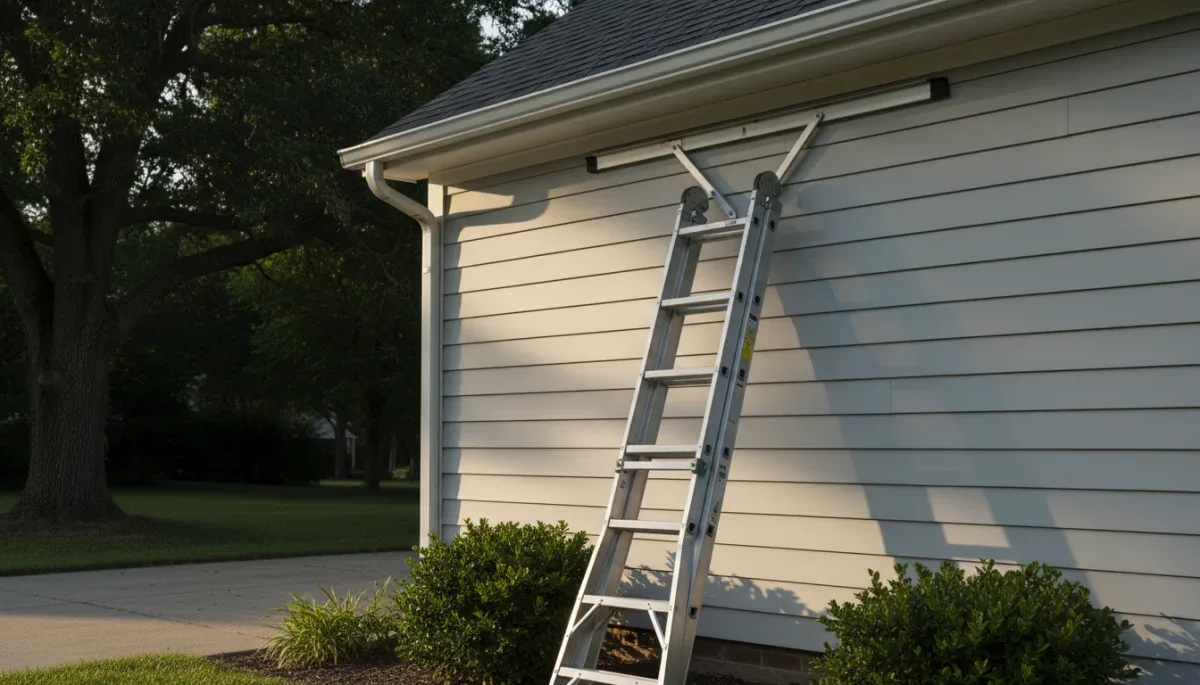
Ladder misuse is the leading cause of crushed, bent, and scratched gutters during holiday decorating. Leaning an aluminum or fiberglass extension ladder directly against the outer rim of a gutter concentrates the entire weight of the ladder and the climber onto a single narrow point. Thin-gauge aluminum gutters will bend inward under this pressure, creating a permanent indentation that obstructs water flow.
The safest and most effective solution is a ladder standoff stabilizer, which attaches to the top rungs of your extension ladder. The wide tubular arms of the stabilizer span across windows or rest securely against the exterior wall siding or roof decking, suspending the ladder rungs several inches away from the gutter trough. This setup eliminates any direct contact between the ladder and the gutter while providing a wider, more stable base for climbing.
Essential ladder safety practices
- Maintain the 4-to-1 ratio: Set the base of the ladder one foot away from the wall for every four feet of ladder height up to the support point.
- Level ground placement: Ensure ladder feet rest firmly on flat, solid ground rather than soft mud, snow, or uneven landscaping.
- Three points of contact: Keep two feet and one hand, or two hands and one foot, in contact with the ladder at all times while ascending or descending.
- Avoid overreaching: Keep your belt buckle centered between the side rails to prevent tipping; descend and move the ladder as you progress along the roofline.
According to safety recommendations from the U.S. Consumer Product Safety Commission (CPSC), users should never stand on the top three rungs of an extension ladder. If you cannot reach your gutters comfortably while standing on lower rungs, use a taller ladder rather than stretching upward or leaning out over the edge.
Managing outdoor electrical connections safely
Electrical safety is closely linked to exterior home protection. Overloaded circuits or exposed electrical connections can cause short circuits, trip breakers, or create fire hazards near dry roof decking and soffit materials. Every outdoor lighting installation must comply with basic electrical safety protocols to protect your home infrastructure.
Always connect outdoor light strings to a Ground Fault Circuit Interrupter (GFCI) protected outlet. GFCI outlets automatically cut power when they detect an electrical imbalance or moisture intrusion, preventing electrical shocks and equipment damage. If your exterior outlets do not have GFCI protection, portable GFCI adapters are available at home improvement stores to provide the necessary safety barrier.
Use only heavy-duty, outdoor-rated extension cords marked with a "W" on the rating stamp, indicating weather resistance. Keep connection points elevated off the ground or enclose them in water-resistant cord gasket boxes to prevent melting snow or rain from penetrating the plug joints. Never route electrical cords through closed window frames or metal gutter downspouts, as pinching can wear away insulation and create live electrical shorts.
Calculating electrical load limits
- Check maximum wattage: Standard household outdoor circuits generally provide 15 or 20 amps, supporting 1,800 to 2,400 total watts respectively.
- Follow the 80 percent rule: Do not load continuous decorative circuits beyond 80 percent of their rated capacity (1,440 watts on a 15-amp circuit).
- Verify string limits: Check the manufacturer tag on each light strand for the maximum number of end-to-end connections allowed.
- Group by technology: Never connect high-draw incandescent strings directly in series with low-draw LED strings.
Step-by-step installation process along the gutter line
A systematic installation workflow minimizes the time spent on ladders and ensures that light strings hang straight without sagging between clips. Preparation on the ground before climbing is essential for both efficiency and physical safety.
Begin by testing every strand of lights while they are still on the ground. Plug them into a power source to verify that all bulbs illuminate and that there are no frayed wires, broken sockets, or damaged insulation. Replace faulty bulbs immediately. Next, attach your plastic clips directly to the light sockets at regular intervals on the ground rather than attempting to assemble them while balancing on a ladder.
Space clips evenly, typically every six to twelve inches. Consistent spacing keeps the light line taut and prevents wind from whipping loose cord loops against your gutter finish. Position your ladder at the starting point nearest your power source, ensuring the stabilizer rests firmly against the siding. Climb with the light strand draped over your shoulder or carried in a tool pouch to keep your hands free for climbing.
Snap each clip firmly onto the front bead of the gutter. As you work across each section, maintain moderate tension on the cord without pulling it so tight that it strains the connection points. When you reach the end of your ladder reach, climb down, reposition the ladder, and continue the process across the entire roofline.
Safe post-season removal and storage
Damage to gutters frequently occurs during post-holiday cleanup rather than initial installation. Tugging on light strings from the ground to pull them down quickly is a common mistake that bends gutter lips, pulls hangers loose from the fascia, and breaks plastic clips, leaving sharp remnants attached to the roofline.
To safely remove holiday lights, set up your ladder and stabilizer using the same safety standards applied during installation. Climb up and gently unhook each clip by hand, releasing tension one section at a time. This deliberate method protects your gutter coating from scratches and keeps the plastic clips intact for reuse in future seasons.
Once all strands are safely lowered, discard any clips that exhibit sun damage, cracking, or loss of spring tension. Wrap light strands neatly around cord reels, cardboard spools, or plastic storage wraps to prevent tangling. Store all lights and accessories in sealed plastic storage bins in a dry, temperature-controlled environment away from moisture and direct sunlight.
At a glance
| Factor | What to know |
|---|---|
| Fastener choice | Use non-invasive UV-resistant plastic clips; never use staples, nails, or screws on gutters. |
| Ladder setup | Equip your extension ladder with a standoff stabilizer to prevent crushing the gutter trough. |
| Power requirements | Connect only to outdoor-rated GFCI outlets using weather-resistant cords marked for exterior use. |
| Removal method | Unhook clips individually from a ladder rather than pulling cords down from ground level. |
Frequently asked questions
Can I leave plastic gutter clips on my roofline year-round?
No, you should remove plastic clips at the end of each season. Prolonged exposure to extreme summer heat and direct sunlight degrades the plastic, making clips brittle, prone to breaking, and capable of trapping leaves and debris inside your gutter channel.
Do gutter clips work on gutters with mesh leaf guards installed?
Standard clips do not fit over most solid leaf covers, but specialized gutter guard clips feature thin hooks that slip directly into mesh perforations. If your guard has no openings, consider shingle tab clips that slide under roof shingles instead.
How many clips do I need per strand of holiday lights?
Plan for one clip per bulb or socket for large C7 and C9 lights, spaced roughly six to twelve inches apart. For smaller mini lights, placing one clip every twelve to eighteen inches provides adequate support while keeping lines straight.
Will plastic clips scratch copper or painted aluminum gutter finishes?
Quality smooth polypropylene clips will not scratch or corrode gutter finishes when installed correctly. Ensure you snap them into place rather than sliding them horizontally along the gutter lip, which could drag trapped dirt particles across the paint.
The bottom line
Hanging holiday lights without damaging your gutters requires non-invasive plastic clips, proper ladder stabilization, and patient installation and removal. Avoiding staples, nails, and direct ladder contact keeps your gutter drainage system functional and prevents costly exterior home repairs. Before you begin hanging your lights, verify that your exterior outlets have functional GFCI protection and confirm that your gutters are securely fastened to the fascia.
Written by
Rita Luiza
Rita Luiza writes about home decorating for papalions.com. Each article explains how things work, compares published details such as prices, policies and program rules, and points readers to the official source before they decide.