5 DIY Wall Art Projects Under $50 That Transform Any Room
Ads
Five budget-friendly DIY wall art projects under $50 each can be completed in one weekend and completely transform any room in your home with creative, personalized touches.
Have you ever walked into a room and felt like something was missing? Perhaps the walls felt bare, or the existing decor failed to reflect your personality. The solution might be simpler than you think. 5 DIY Wall Art Projects That Cost Under $50 and Transform Any Room in One Weekend offers an accessible way to breathe new life into your living spaces without breaking the bank or requiring professional skills. Whether you are a seasoned crafter or someone who has never held a paintbrush, these projects are designed with beginners in mind while delivering results that look anything but amateur.
Why DIY Wall Art Transforms Your Space Without Breaking the Bank
There is something uniquely satisfying about creating art with your own hands. Beyond the obvious cost savings compared to purchasing ready-made pieces, DIY wall art allows you to customize every detail to match your existing decor and personal style. The process itself becomes a rewarding experience, and the final piece carries sentimental value that store-bought artwork simply cannot replicate.
Creating your own wall art also provides flexibility. You can experiment with colors, sizes, and techniques until you find the perfect match for your space. Most of the materials needed for these projects are readily available at craft stores, dollar stores, or even items you might already have at home. The key is approaching each project with patience and a willingness to embrace imperfections as part of the artistic process.
What Makes These Projects Ideal for Beginners
- All projects use affordable materials costing under $50 each
- No prior art experience or specialized skills required
- Projects can be completed in a single weekend
- Tools and supplies are easily accessible at local stores
- Each project offers room for personal creativity and customization
These five projects have been selected specifically because they balance simplicity with visual impact. You do not need expensive equipment or years of training to achieve professional-looking results. What you need is a willingness to try, some basic supplies, and a weekend dedicated to creative expression.
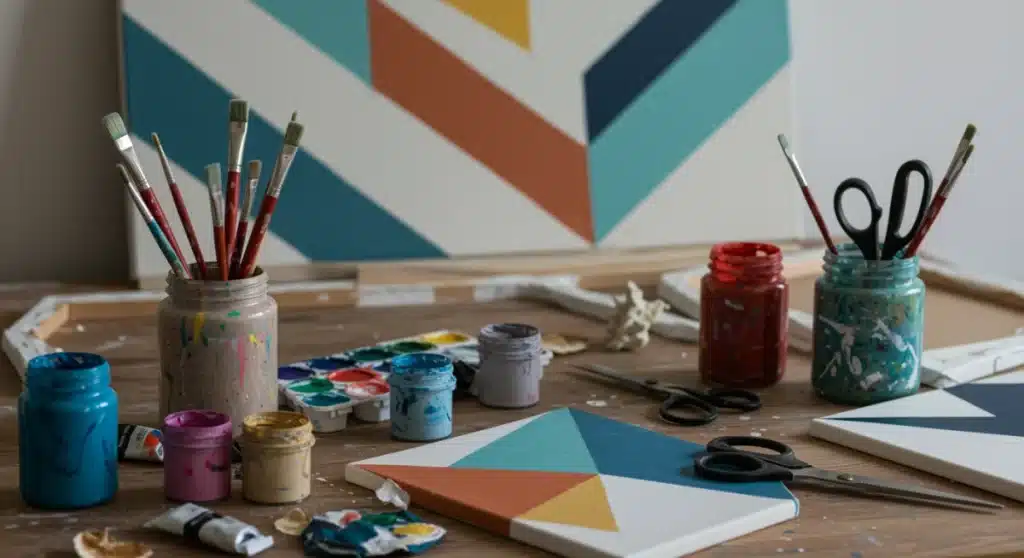
Geometric Canvas Painting: Bold Color Blocking for Modern Spaces
Geometric canvas paintings have become a staple in modern interior design, and for good reason. They offer a contemporary look that works well in living rooms, bedrooms, and even home offices. The beauty of this project lies in its flexibility: you can choose any color palette that complements your existing decor, from bold and vibrant to soft and muted.
To begin, you will need a blank canvas (typically 16×20 inches works well for most spaces), acrylic paints in your chosen colors, painter’s tape, and a few brushes. The total cost typically falls between $25 and $35, depending on the brands you select and whether you already have some supplies on hand.
Creating Your Geometric Design
- Plan your design on paper before painting to visualize the final result
- Use painter’s tape to create clean lines between color blocks
- Apply multiple thin coats of paint rather than one thick layer
- Remove tape carefully while the paint is still slightly tacky
- Allow the canvas to dry completely before hanging
The technique involves dividing your canvas into various shapes using painter’s tape, then filling each section with a different color. Once the paint dries, removing the tape reveals crisp, clean lines that create a professionally designed look. You can opt for simple triangles, more complex hexagons, or abstract shapes that speak to your personal aesthetic.
This project typically takes three to four hours to complete, including drying time. The result is a statement piece that draws the eye and serves as a conversation starter. Geometric art works particularly well above sofas, beds, or mantels where it can be the focal point of the room.
Pressed Flower Frame Display: Nature’s Beauty Preserved
There is something eternally appealing about incorporating natural elements into home decor. Pressed flower frame displays bring the beauty of the outdoors inside while adding a touch of elegance and fragility to your walls. This project appeals to those who appreciate organic, botanical aesthetics and want to create something truly unique.
The supplies needed are surprisingly simple: a frame (thrift stores often have affordable options), pressed flowers (which you can make yourself or purchase pre-pressed), backing board, and optionally, glass or acrylic for protection. Total cost typically ranges from $15 to $30, making this one of the most budget-friendly options on our list.
Tips for Pressing and Preserving Flowers
- Press flowers between heavy books with parchment paper for two to three weeks
- Choose flowers with flat blooms like daisies, pansies, or ferns
- Work quickly once flowers are pressed to prevent them from becoming brittle
- Use tweezers to arrange delicate flowers in your frame
- Consider adding a layer of clear glass or acrylic for protection
The process of creating pressed flower art is meditative and rewarding. You can collect flowers from your own garden, purchase them from a florist, or even use flowers from special occasions that you want to remember. Each piece becomes a personal artifact, capturing a moment in time through nature’s delicate beauty.
This type of wall art works beautifully in bedrooms, bathrooms, or any space where you want to create a calming, nature-inspired atmosphere. The soft colors and organic shapes complement bohemian, farmhouse, and minimalist decor styles equally well.
Macramé Wall Hanging: Bohemian Texture and Craftsmanship
Macramé has experienced a significant resurgence in recent years, and it is easy to see why. These woven pieces add texture, warmth, and a bohemian flair to any room. While the technique may look intricate, basic macramé is surprisingly accessible to beginners with a little practice and patience.
For this project, you will need macramé cord (cotton or jute work well), a wooden dowel or branch for hanging, and scissors. The cost remains under $40 for most projects, and you can find all supplies at craft stores or online retailers. The satisfaction of creating something with your hands, watching intricate knots come together to form a beautiful whole, is genuinely unmatched.
Essential Knots for Beginners
- Lark’s head knot: used to attach the cord to the hanging rod
- Square knot: the foundational knot for most patterns
- Spiral knot: creates beautiful twisted rope effects
- Double half hitch: adds decorative rows to your design
- Fishnet knot: creates the classic macramé grid pattern
The process begins with cutting your cord into various lengths, then attaching them to your wooden rod using the lark’s head knot. From there, you can follow basic knotting patterns to create texture and visual interest. Many free tutorials are available online, ranging from simple square knot patterns to more elaborate designs featuring feathers, beads, or wooden rings.
Macramé wall hangings work exceptionally well above beds, in entryways, or in living rooms where they can add warmth and texture. The natural fibers bring an earthy quality to your space that pairs beautifully with plants, wooden furniture, and neutral color palettes.
Abstract Paper Cutout Art: Playful Shapes and Shadows
Abstract paper cutout art offers endless possibilities for creative expression. This project involves cutting various shapes from colored paper and arranging them on a backing to create depth, movement, and visual interest. The interplay of different colored papers against each other creates a dynamic piece that changes as the light in your room shifts throughout the day.
The materials are inexpensive and easy to find: colored cardstock or construction paper in various shades, scissors, a frame or backing board, and adhesive. Most projects can be completed for under $30, and you likely already have scissors and paper at home. This makes it an excellent choice for those just starting their DIY journey.
Design Principles to Consider
- Balance bold colors with neutrals to prevent visual overwhelm
- Use varying sizes of shapes to create depth and interest
- Layer shapes on top of each other for a three-dimensional effect
- Consider the overall flow and movement of your composition
- Step back frequently to assess the balance of your design
The creative process is intuitive and forgiving. You can create abstract shapes freely, letting your instincts guide you, or you can plan a more deliberate design. Either approach yields beautiful results. Some crafters prefer to arrange and rearrange their pieces before committing with adhesive, while others embrace the spontaneity of direct application.
This type of art is particularly versatile. It works in children’s rooms (where you can incorporate fun, bright colors), offices (where more muted tones create a professional yet creative atmosphere), and living spaces where you want to add a pop of color without committing to something too permanent.
Painted Terracotta Tile Mosaic: Earthy Elegance on a Budget
Transforming simple terracotta tiles into a mosaic wall art piece brings together the warmth of earthy tones with the satisfaction of creating something truly unique. This project combines painting techniques with mosaic aesthetics, resulting in a piece that looks far more expensive than its actual cost.
You will need terracotta tiles (available at hardware stores for a few dollars each), acrylic paints, grout (optional, for a more authentic mosaic look), and mounting hardware. The total cost typically stays under $45, making this an affordable way to create a high-impact piece. You can use anywhere from four to twelve tiles depending on the size of the area you want to fill.
Painting Techniques for Terracotta
- Apply a primer or base coat to ensure paint adheres properly
- Use stencils for precise patterns or paint freehand for organic designs
- Seal the finished tiles with a clear coat to protect your artwork
- Consider combining painted tiles with untreated natural tiles for contrast
- Arrange tiles on the floor before mounting to preview your design
The beauty of this project lies in its versatility. You can create a cohesive design where all tiles follow a similar pattern, or you can treat each tile as an individual piece of art that comes together in a dynamic composition. Some crafters paint each tile in a different color of the same design, while others create a larger scene or pattern that spans across all tiles.
Terracotta tile mosaics work wonderfully in kitchens, bathrooms, or outdoor spaces where their earthy texture and colors can shine. They also make excellent gifts, as each piece is completely unique and made with care.
Planning Your Weekend: Time Management for All Five Projects
Completing all five projects in one weekend is ambitious but entirely achievable with proper planning. The key is to approach the weekend strategically, starting with projects that require drying time first, then moving to those you can complete more quickly. This way, you maximize your productive hours while allowing adequate drying time for paint, glue, and other materials.
Friday evening works well for projects requiring longer drying times. Start your geometric canvas painting and your terracotta tile project early, allowing them to dry overnight. Saturday morning brings an opportunity to work on your pressed flower frame or macramé hanging, both of which can be completed in several hours. Sunday provides time for finishing touches and any final assembly.
Suggested Weekend Schedule
- Friday evening (3-4 hours): Geometric canvas painting and terracotta tile base coats
- Saturday morning (2-3 hours): Macramé wall hanging
- Saturday afternoon (2-3 hours): Pressed flower arrangement
- Sunday (3-4 hours): Paper cutout art and final assembly of all pieces
Remember that drying times vary based on humidity, temperature, and the specific products you use. Planning ahead ensures you are not rushed and can enjoy the creative process rather than feeling stressed about deadlines. The goal is not perfection but the joy of creating something beautiful for your home.
Consider the flow of your weekend and be flexible. If a particular project inspires you to spend more time on it, embrace that creativity. The beauty of DIY is that there are no strict rules, only guidelines that help you achieve your vision.
| Project | Estimated Cost |
|---|---|
| Geometric Canvas Painting | $25-$35 |
| Pressed Flower Frame | $15-$30 |
| Macramé Wall Hanging | $25-$40 |
| Abstract Paper Cutout Art | $15-$30 |
Frequently Asked Questions About DIY Wall Art
Basic supplies include canvases, acrylic paints, brushes, scissors, paper, frames, and adhesive. Most projects also require painter’s tape, pencils for sketching, and protective sealants. Craft stores carry everything you need, and many items can be found at dollar stores for budget-friendly prices.
Most projects take between two to four hours of active work, not including drying time. Geometric canvas paintings and terracotta tile projects require overnight drying between coats. Planning your weekend to account for drying times ensures all five projects can be completed comfortably within two to three days.
Absolutely. Each project is designed to be fully customizable. You can choose any color palette, adjust sizes to fit your space, and modify designs to reflect your personal style. The beauty of DIY wall art is that you control every element, ensuring the final piece complements your existing decor perfectly.
No prior experience is required. These projects are specifically designed for beginners and those who may feel intimidated by art-making. Simple techniques, clear instructions, and forgiving materials make it easy for anyone to create beautiful wall art. The focus is on creativity and personal expression rather than technical perfection.
Most pieces can be hung using standard picture hanging hardware available at hardware stores. For lighter pieces like paper art, adhesive hanging strips work well without damaging walls. Heavier pieces like canvases or tile mosaics may require wall anchors or screws. Always consider the weight of your creation when selecting hanging hardware.
Conclusion
Creating beautiful wall art for your home does not require extensive artistic training or a massive budget. These five DIY projects demonstrate that with simple materials, some creativity, and a weekend of focused effort, you can transform any room in your house. Each project offers its own unique character and charm, from the modern boldness of geometric canvas paintings to the natural elegance of pressed flower displays. The satisfaction of hanging something you created yourself adds immeasurable value to your home and your sense of accomplishment. So gather your supplies, set aside some time, and discover the joy of bringing your walls to life with handmade art that reflects your unique personality and style.


