How to Create a Gallery Wall in 3 Hours: Step-by-Step Guide
Ads
Create a beautiful gallery wall in 3 hours using standard frame sizes by planning your layout, gathering materials, preparing the wall, hanging frames with precision, and adding final styling touches.
Transforming a plain wall into a stunning gallery wall doesn’t require professional help or an entire weekend. With proper planning and the right standard frame sizes, you can complete this project in just three hours. This guide walks you through each step, ensuring professional-looking results without the guesswork.
Planning Your Gallery Wall
Before purchasing a single frame, you need a clear vision of your final result. Start by measuring your wall space carefully, noting the width and height available for your arrangement. Consider the furniture below the wall—if you’re placing the gallery above a sofa, leave at least six to eight inches between the bottom frame and the furniture top. This breathing room creates visual balance and prevents the display from feeling cramped.
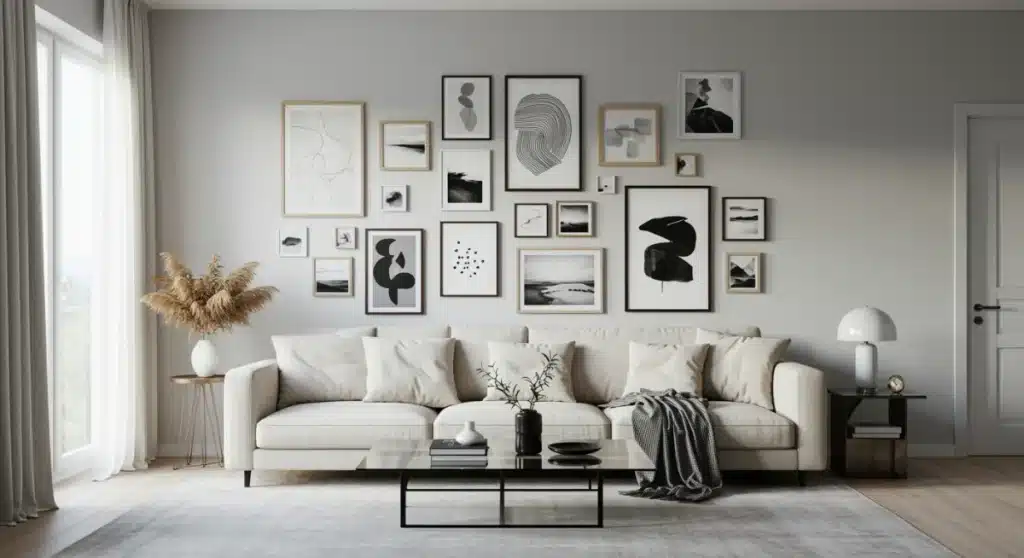
Think about the mood you want to establish. A cohesive gallery wall typically follows a consistent theme, whether that’s family photographs, botanical prints, abstract art, or a mix of vintage finds. You might choose a monochromatic scheme with black and white images for a sophisticated look, or embrace color variety for an eclectic, bohemian feel. The planning stage sets the foundation for everything that follows.
Choosing Your Frame Combination
Standard frame sizes work beautifully because they’re readily available and affordable. Most home improvement stores carry common dimensions, making replacements easy if needed. The key is selecting sizes that create visual interest through variety while maintaining harmony through consistent styling.
- Small frames (8×10 inches) work well for intimate photos or detailed illustrations
- Medium frames (11×14 or 12×16 inches) serve as versatile anchors in your arrangement
- Large frames (16×20 or 18×24 inches) create dramatic focal points
- Extra-large frames (24×36 inches) work as statement pieces in spacious areas
Mix at least three different sizes to create dynamic visual rhythm. A wall filled with identical frames often looks过于 rigid, while varied sizes add personality and flow.
Gathering Materials and Standard Frame Sizes
Once your plan is solid, assemble all necessary materials before starting the installation. This preparation prevents mid-project store runs that extend your timeline beyond three hours. Gather your frames, hanging hardware, a measuring tape, pencil, level, hammer, and wall anchors appropriate for your wall type.
For drywall installations, standard wall anchors or picture hanging hooks rated for your frame’s weight work best. If your frames are lightweight (under five pounds), adhesive hanging strips offer a damage-free option—though these may not hold up over time in high-traffic areas. Heavier frames require proper anchors driven into wall studs or hollow wall anchors that distribute weight effectively.
Consider your frame finish selection carefully. Matte black frames offer contemporary sophistication and pair well with almost any wall color. Natural wood frames bring warmth and work beautifully in traditional or farmhouse-style spaces. White frames create a clean, gallery-like appearance that makes artwork pop. For a truly personalized look, mix frame finishes thoughtfully—perhaps two black frames, two wood frames, and one white frame in a cluster.
Don’t forget to prepare your artwork before hanging. Clean glass surfaces with a gentle glass cleaner, and ensure prints or photographs are centered properly within their mats. If using canvas prints, check that they’re stretched evenly and free of wrinkles or sagging.
Preparing Your Wall and Layout
The secret to a professional-looking gallery wall lies in the layout preparation. Never simply hold frames against the wall and mark spots—this approach rarely yields balanced results. Instead, create paper templates for each frame using butcher paper or newspaper. Cut the paper to exact frame dimensions, then arrange these templates on your floor to experiment with composition.
This floor layout allows you to step back and evaluate proportions without climbing ladders repeatedly. Move pieces around until you find a configuration that feels right—perhaps a centered cluster with larger frames in the middle, or an asymmetric arrangement that draws the eye across the wall. Take a photograph of your successful floor layout for reference.
Transferring Layout to Wall
When you’re satisfied with the floor arrangement, measure carefully from a fixed reference point—perhaps the edge of a window or door frame—to determine where each template belongs on the wall. Mark the top center of each frame position with a light pencil mark. This method ensures accurate placement and prevents the frustrating experience of hanging frames only to discover they’re crooked or unevenly spaced.
- Measure twice, mark once—always verify distances before committing to pencil marks
- Use a laser level or traditional bubble level to ensure horizontal alignment
- Account for frame hanging hardware (the distance from the hook to the frame top)
- Leave consistent spacing between frames—typically two to three inches
Mark the exact nail or anchor position for each frame, then double-check all marks against your floor layout photograph. This preparation phase might feel time-consuming, but it dramatically improves your final result and actually saves time by reducing repositioning needs.
Hanging Frames with Precision
Now comes the satisfying part—actually hanging your frames. Start with the largest or most central frame first, as this establishes the visual anchor for your arrangement. Drive your hanging hardware into the marked positions, using appropriate anchors for your wall type. For drywall, a simple picture hook hammered at a 45-degree angle usually provides sufficient support for frames weighing up to twenty pounds.
After installing hardware, hang the first frame and step back to verify its position. Use your level to check that it’s perfectly horizontal—small adjustments now are easier than later. If the frame isn’t level, remove it and adjust the hook position slightly. Most frames can tolerate only minor adjustments, so getting the placement right initially matters greatly.
Work outward from your central anchor frame, installing and hanging each subsequent piece in sequence. Maintain consistent spacing between frames by using spacers—simple wooden blocks or even playing cards work perfectly. This consistency creates the polished, intentional appearance that distinguishes professional installations from amateur attempts.
For particularly heavy frames, consider using two hooks per frame for added stability. This dual-anchor approach prevents swaying and ensures your artwork stays securely mounted even during household activity or accidental contact.
Adding Final Touches and Styling
With all frames hung, step back and evaluate your gallery wall from multiple angles and distances. Walk through the room as someone would normally view the wall—enter from different doors, sit on furniture, stand at various distances. This perspective check reveals any adjustments needed before you consider the project complete.
Small refinements make a significant difference. If a frame sits slightly lower than its neighbors, the hardware might have slight variations—some frames hang a quarter inch differently despite identical hook positions. Adjust individual hooks as needed until visual alignment satisfies your eye. Remember that perfect mathematical alignment isn’t always necessary; visual balance matters more than technical precision.
Lighting Considerations
Consider whether your gallery wall benefits from additional lighting. Frameless artwork or pieces in darker rooms might need accent lighting to highlight their presence. Small picture lights installed above frames provide elegant illumination without requiring electrical work—battery-operated options eliminate cord visibility entirely.
- Adjust framing if certain pieces feel visually heavy compared to others
- Clean fingerprints and dust from glass surfaces after installation
- Verify all frames hang securely without wobbling
- Step back periodically during adjustments to assess overall balance
Your gallery wall might feature a mix of framed photographs, unframed canvases, three-dimensional objects, or decorative mirrors. Ensure consistent visual weight across varied elements—if one piece appears significantly heavier, adjust its placement or add surrounding smaller pieces to create equilibrium.
Maintaining Your Gallery Wall
Your newly installed gallery wall requires minimal maintenance, but occasional attention keeps it looking fresh for years. Dust frames regularly with a soft, dry cloth or microfiber duster. For glass-covered pieces, clean fingerprints and smudges with a gentle glass cleaner applied to your cloth rather than directly on the glass—preventing moisture from seeping into frame edges protects your artwork.
Periodically check that all frames remain securely mounted. Over time, wall anchors can loosen, especially in newer construction where drywall settling occurs. A monthly visual inspection takes seconds but prevents potential accidents from falling frames. Simply glance at each piece to confirm nothing has shifted or drooped.
Consider rotating artwork periodically to prevent sun damage and refresh your space’s appearance. Swap seasonal photographs, introduce new prints you’ve collected, or rearrange the configuration entirely. A gallery wall isn’t permanent—it’s a living decoration that evolves with your tastes and memories. This flexibility makes gallery walls particularly valuable in frequently updated living spaces.
Conclusion
Creating a stunning gallery wall in three hours is entirely achievable with proper planning, the right standard frame sizes, and careful attention to installation details. By measuring your space, gathering materials beforehand, preparing a paper layout, and hanging frames with precision, you transform ordinary walls into personalized art displays. The key lies in the preparation—spending time on layout and marking ensures the hanging process proceeds smoothly and yields professional results. Your gallery wall becomes a focal point that reflects your personality and showcases what matters most to you.
| Key Point | Brief Description |
|---|---|
| Planning Phase | Measure wall space, choose theme, select frame sizes (8×10 to 24×36 inches) |
| Materials Needed | Frames, hanging hardware, measuring tape, pencil, level, hammer, wall anchors |
| Layout Technique | Create paper templates, arrange on floor, transfer to wall with precise measurements |
| Installation Process | Start with center frame, work outward, maintain 2-3 inch spacing between frames |
Frequently Asked Questions
Create paper templates matching your frame dimensions, arrange them on your floor first, then photograph the layout before transferring positions to your wall with precise measurements. This floor-to-wall method saves significant time compared to repositioning hung frames.
Mix small (8×10), medium (11×14), large (16×20), and extra-large (24×36) inch frames for visual interest. Include at least three different sizes, and ensure larger frames serve as anchors while smaller pieces fill gaps and add detail.
Maintain two to three inches of space between frames for a cohesive look. Adjust spacing slightly larger for bigger frames and tighter for small pieces, but consistency creates the polished, professional appearance that distinguishes quality installations.
Yes, a single person can complete a gallery wall in three hours with proper preparation. The key is spending the first hour on planning and layout, leaving two hours for hanging. Having all materials ready before starting prevents time-consuming interruptions.
Essential tools include a measuring tape, pencil, hammer, level, and appropriate wall anchors for your frame weights. Picture hanging hooks work for lightweight frames, while heavier pieces require wall studs or hollow wall anchors for secure mounting.
Conclusion
Your gallery wall represents a personal statement that transforms any room from ordinary to extraordinary. The three-hour timeline proves that achieving professional-looking results doesn’t require professional experience—only careful planning, the right standard frame sizes, and attention to installation details. Start with measurements, create your paper template layout, gather materials, and follow the hanging process step by step. Within three hours, you’ll stand back and admire a customized display that reflects your unique style and showcases the images and artwork that matter most to you.


")

